Showing posts with label stencils. Show all posts

Monday, 29 June 2015

Life update and art journal share: How meditation works for me


Hey guys. Ive been super busy lately. June is a very busy month for our family. We have my father-in-laws birthday, my fathers birthday, Steve's birthday, my birthday, fathers day, and our wedding anniversary. This is the card I made as copper is the traditional 7th wedding  anniversary gift.


We purposely kept all of the days pretty low key. On my birthday I binge watched criminal minds episodes, Steve did the school run for me, I had a NAP, and went out for a great meal. The perfect day for me. Here are a few cards from my lovely friends at card club:


 and out for dinner:


Now we are back to normality for a few weeks. I want to get the garden tidied up before my MOM COMES BACK FOR A VISIT! That's right, my mama is coming.  I'm really exited if you haven't noticed by my dramatic use of ALL CAPS. She will be here for the last week of school for Scarlett, and her last week we have booked a week in the Isle of Wight. None of us have been there and everyone tells us its beautiful. We booked a cottage about a 1/4 of a mile from a sandy beach. You better believe I will be blogging all about it.

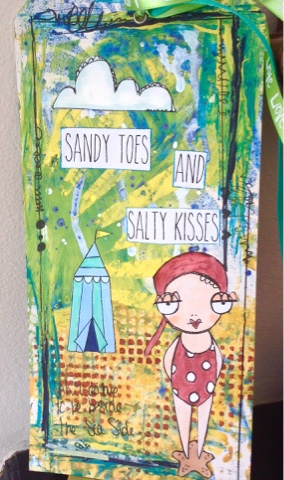
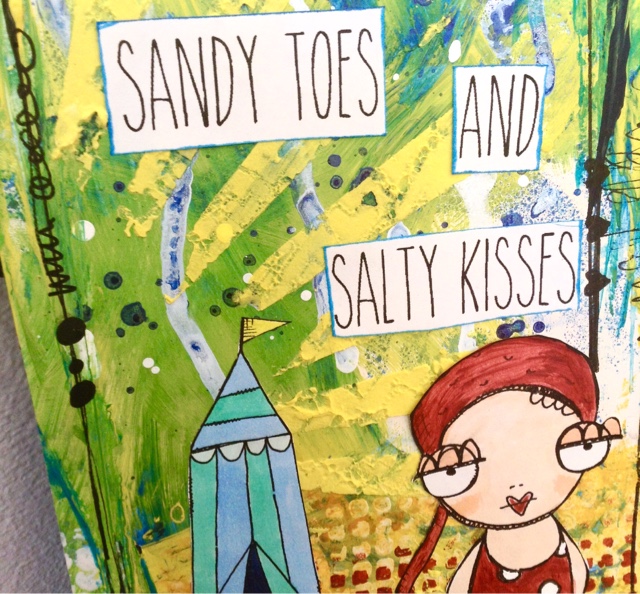
Ive also been playing in my art journal. This has been a difficult page for me. By that I mean I really liked it, then I didn't, then I was annoyed with myself for overworking it, and then I fixed it. It has been a great learning experience though. That's the amazing part of art and art journalling. All those emotions over some paint on a page.  It can take you through a range of emotions and you come out the other side learning something about yourself.

I started by putting a few stencils down, and then completely white washed the back round using gesso. Then I just continued stencilling and layering. Paying attention to what colours are over what and keeping in mind the overall composition.


I put a prima stencil down and used a distress tool with a victorian velvet distress ink to outline a
flower towards the center of the page. I then just used a mixture of gelatos, white and black posca pens and even a red sharpie to get the flower how I wanted. Now, I'm not in anyway a professional and I dont claim to be with my colouring. Meaning, im not going for realism.


Then I coloured in a stamped image of a Prima bloom girls stamp with prismacolour pencils. I cut it out with scissors and a cutting blade for the fiddly bits. I pasted it down using studio multi medium.


Then.....I ruined it. I put some awful lettering right above the flower and it looked..bad. I was mad at myself for an entire afternoon. I even mentioned it to my husband about the page screw up over dinner. Of course he said it looked great. He always does, bless him. I had a mini temper tantrum within myself saying how much I suck and I should just give up on art journalling right before I went to bed.

I woke up the next morning and it was a Saturday. I had no rush so I like to start my day with some meditation. Whilst I was meditating I completely cleared my mind. It allowed me to shed all of my insecurities and get over my hurt ego.

When I was finished I approached my journal in a new way. I fixed it. I pulled some sheet music pages apart, and pasted it using white gesso giving a whitewash coat over it.  I took a script stencil and used some yellow distress ink over it, and stamped a Dina Wakely stamp using blue archival.  I used the archival ink as it stamps a more sharp image then the distress ink.


Ta-Da! I like it again. I mean I know its not perfect but I like the composition and I fixed it. That means something. I like the journey I went down with this page.  That's what its all about.. the journey.


speak soon lovelies!!

                                                                         Always, -Kass

Monday, 8 June 2015

Project share: Vera Lane seaside tag

Hello you lovely lot. I wanted to share with you a tag I made the other day using some Vera Lane digi images. I used many different mediums on this tag. Fresco chalk acrylics, dylusions sprays, washi tape, copic markers, and ranger texture paste to be exact.


 The little squiggles and writing was done with my copic fineliner 1.0 pen. The larger tip on this pen has done a good job drawing over the painted bits.To colour the girl (her name is "olivia" by the way), I used some cheap metallic paints a friend picked up from the pound store.


  I had a lot of fun putting this together. I don't worry to much about straight lines and perfection. It feels good to just let yourself go with it and have fun.


In other news we went to the most fun wedding over the weekend. My friend Sarah  from Kippers and curtains put together a gorgeous outdoor themed wedding in the forest around the corner from the house. I'm going to be posting a bunch of pics of that soon but here is a selfie of me and the bride.


Stay tuned for more updates.x

                                                                        Always,-Kass


Wednesday, 13 May 2015

Card share/tutorial feat. Vera Lane digi stamps


Hey guys, I just wanted to share a fun card I made yesterday using Vera Lane digi images.

To make the card I blended  cracked pistachio (lightly) and squeezed lemonade distress inks on a 5 1/2 x 5 1/2 piece of card stock. Then I went over the squeezed lemonade with a diamond pattern stencil using mustard seed distress ink, and the cracked pistachio with the same colour (cracked pistachio) just applied with a bit more pressure.


After I was finished with that I cut out the images and coloured them in. I like to place them on the card throughout the process, checking my composition.


I decided on two different pieces of washi tape to put under the tree and the dog. I did that just to anchor them down and because well, I love washi tape. I could then paste the images down using a gel matte medium. You could use whatever you have handy.


Then I just took a fineliner pen and did a dot dot dash pattern around the edge creating a border. After that I decided to experiment by using acrylic paints over the copic markers on the dog to give him a bit more dimension. I liked how it turned out. Its kinda has a painterly look to it, which I'm really into.


I hope you guys like it and maybe it even gave you a little creative inspiration of your own. Before you go, have a look at this project as well. I used Vera Lane images for it as well. Thanks, and have a great day!

                                                                                 Always -Kass


Wednesday, 6 May 2015

Stampotique designers challenge: Stencils

Hi guys! Ive decided to join in on the stampotique designers challenge this week. I love my stampotique stamps  but have been neglecting them lately. So this was the perfect opportunity to get them out and have a play! This week is hosted by Corrie Herriman and here was the challenge:

"Hello and Happy Wednesday!  I love using stencils.  They add another layer to your background and lots of interest too.  Use them with paint, ink model paste or even gesso.  Show me what you do with stencils and have fun!"


I chose to work in my art journal for this challenge. This is a relatively new concept for me and I'm not used to the layout. Its a lot of space compared to the cards and tags I usually make! So I'm not too sure about how this turned out , but its my art. Its from my soul and it has lovely stampotique images So I decided to jump in the deep end and show it to you guys. Here it is:


There are so many layers I lost count! I just kept on working and working till I was happy with what I had. I used daniel Torrente's smushallaum and smushasha, all kinds of stencils with normal texture paste, and transparent texture paste. Then I used dylusions sprays, prima bloom sprays, and treasure gold (told you I worked it a lot). I finished off with moody song lyrics from one of my favourite Florence and the Machine songs. I liked how it said "ghouls" in the lyrics, as these mermaids remind me of "ghouls playing".

Hope you like it as much as I had fun making it! I hope to join in on more challenges soon.

here some more close ups:


                            I like the way the treasure gold makes it shimmer in the light!


                                   Thanks for stopping by!  see ya soon.x
                                                           
                                                                                     Always, -Kass