Showing posts with label washi tape. Show all posts

Monday, 15 June 2015

Art Journal page inspired by Dina wakely


Hello all, I hope this post finds you all happy and well. Ive been rather chipper myself lately and I'm chalking it down to sunshine. I feel so much happier when able to spend some long hours out in the garden getting my hands dirty. June is the time of year when things really start to bloom and take over in the garden. It's gorgeous but it is high maintenance.


 But that's not what I'm here to talk about today. I'm here to talk about a fun, flowey, art journal page I created. This week I was stoked to receive my squiggly birds stamp set by Dina Wakely, in the mail. I immediately had to get to work with them. I grabbed my favourite bird and decided to create an art journal page. This project was inspired by the artist Dina Wakely. I'm very inspired by her recently. I love her style so much. Bold contrasts, painterly brush strokes, and a "no fear" attitude when it comes to white space. To check out more of her work , click here

So here's my go at a flowy back round mixed media art journal page:


 The Materials I used on this project:

Fresco chalk acrylics- chalk, dolly mix, orange

 Daler rowley Hard bodied acrylics- magenta, turquoise, yellow

Black gesso or paint

Silver metallic acrylic paint

Large, hard bristled paint brush

Copic fineliner pen 1.0

Scissors

Washi tape- pink/white stripe, music notes

Stencils- Chevron stripes, small squares, some bottles or glasses (you can use the bottom for different size circle stamps)

Magazine clippings and/or printouts of words you can make a sentiment from

Dina Wakely Squiggly birds stamp set, and her textures stamp set

Archival ink-jet black

1. Create a flowey back round by adding water to your hard bodied acrylics and "swoosh" different colours to your liking. I like the contrast from light white to dark black and everything in between.


2.Use your stencils. First with the chalk fresco colour through the chevron stencil then stamp Dinas grunge circles with the dolly mix fresco colour. Then run your orange colour through the stencil with the tiny squares. Try and put these in compositionally  pleasing places. A rule I always go by is placing things in odd numbers. For example,  the dolly mix grunge circles I have stamped in groups of three on adjacent corners.


3.Then grab the silver metallic paint and stamp it around using the bottoms of some glass jars you have handy. (dylusions sprays work, lid from gesso pots, also glass jar lids).

4. Stamp the bird with black archival ink. Preferably in some white space so you can see it clearly.


5. Rip off 2 bits of washi tape and position them so the bird is standing on them.

6. When the page is completely dry take your fineliner pen and draw squiggles and lines randomly throughout the journal page.

7. Cut out a word or quote from your magazine clippings and paste them on how you like. I went for a quote from my favourite book The catcher in the rye by J.D. Salinger. :

"she wasn't doing a thing that I could see, except standing there,leaning on the balcony railing,holding the universe together."

8. That's it , your done. Stand back and admire your artwork.

Hope you guys liked this page. Don't forget to follow me on here and on instagram.  the link can be found here: Her altered heart instagram page,

most of the materials you see on the list can be found online at some of the following shops:

Art from the heart     a sprinkle of imagination  The craft barn  (these are UK based shops)

For some more of my projects like this one click on the following links:

Vera Lane Seaside Tag

Stampotique art journal page

All about the journey card (suzi blu inspired)

Thanks, thats it for today! Check back soon .x

                                       Always, -Kass


Monday, 8 June 2015

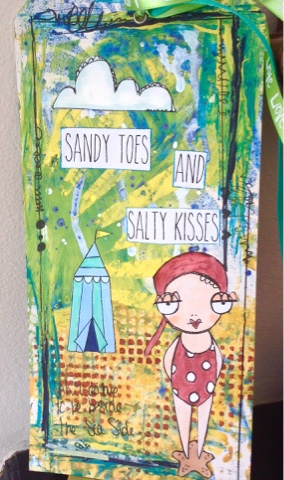
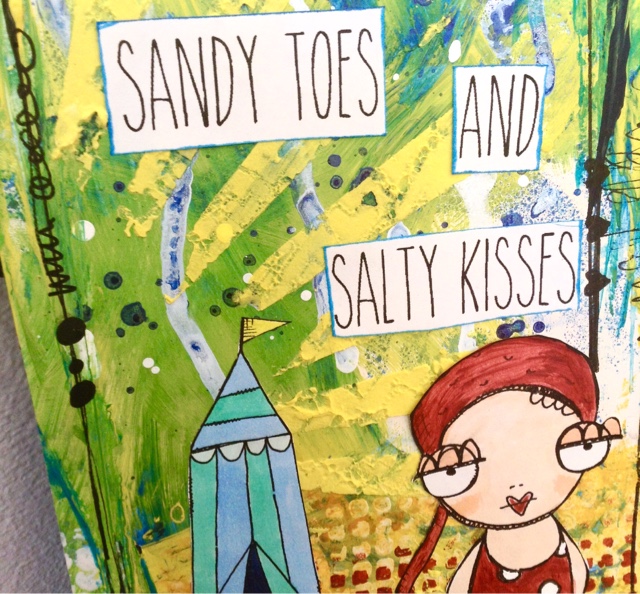
Project share: Vera Lane seaside tag

Hello you lovely lot. I wanted to share with you a tag I made the other day using some Vera Lane digi images. I used many different mediums on this tag. Fresco chalk acrylics, dylusions sprays, washi tape, copic markers, and ranger texture paste to be exact.


 The little squiggles and writing was done with my copic fineliner 1.0 pen. The larger tip on this pen has done a good job drawing over the painted bits.To colour the girl (her name is "olivia" by the way), I used some cheap metallic paints a friend picked up from the pound store.


  I had a lot of fun putting this together. I don't worry to much about straight lines and perfection. It feels good to just let yourself go with it and have fun.


In other news we went to the most fun wedding over the weekend. My friend Sarah  from Kippers and curtains put together a gorgeous outdoor themed wedding in the forest around the corner from the house. I'm going to be posting a bunch of pics of that soon but here is a selfie of me and the bride.


Stay tuned for more updates.x

                                                                        Always,-Kass


Saturday, 2 May 2015

Kids craft: DIY washi tape Bracelets

Today Scarlett and I decided to make our own bracelets. My initial idea was to make them with a Native American theme, but we kinda veered off that plan and ended up doing whatever we wanted. I guess it still looks Native American with the colour palette and design.This was a joint effort between us as Scarlett needed my help with things like the stapler, and crop-o-dile punch. we made two bracelets. One thicker than the other.


The thicker one:

For the base I used a thick brown card. I started by measuring it around my daughters wrist as a guide and cutting it to size. I secured that with a stapler.


Than Scarlett took different designs of washi tape and taped them around the bracelet leaving 1" gaps between each design. We used a stronger duct tape for the part over the staples to hold it down properly. (it is the one with multi coloured chevron design.)

Than I (I had to help with this part) took my crop-a-dile punch and poked 3 holes in the gaps between the washi tape.We chose black eyelets, and secured them as well.


Then Scarlett weaved black and white string through the holes and I helped her tie them in the back.  That's it! I think it looks good considering how easy it is to make.


 The thinner one :

We used pretty much the same process as above. The only difference is we put the washi tape next to each other in rows, The holes/eyelets are in a straight line, and we added some beads. Oh, and we also used dark blue wool/vinyl mix thread instead of twine (because its what I had).


  Materials I used:

brown card
dark blue thread
black and white twine
yellow beads
various washi tapes
various duct tapes
scissors
crop-o-dile punch and eyelet setter


There are many variations to this craft. I definitely did not make this up. People have been grabbing what they see around them and making jewellery for centuries. Why don't you see what you have around your house and have a go? If you do please share pictures! I love seeing your projects! That's all for now , take care and thanks for stopping by. x


                                                                                Always,  - Kass


Tuesday, 28 April 2015

Project share: With Vera Lane digi images


Hello my lovelies, today I have a quick project to share with you. I made this card using a Vera Lane digi image. You can shop for it here. Vera lane studio's etsy shop is an online shop that sells digital images for your use in mixed media art projects. The images are made by the very talented Janet Klein who also designs rubber wood mounted stamps for the company stampotique. Search their images here.

First I  applied cracked pistachio and tattered lace distress inks directly to my craft sheet, spritzed with water, and ran a piece of card through.

Then I grabbed various stencils and made designs roughly all around it. I like to use transparent paints so I can see the layers underneath.  I then thought the girls dress was fading in the background to much so I white washed a bit of Victorian velvet and white gesso behind where the image would be placed.

I then used tuxedo blue fresco paints and a lid to a spray can to form the circles.

I put some washi tapes in the upper right hand corner and under the image to anchor it.

 Then I went around the card with a fine liner pen first making straight lines. Then over some of the straight lines with squiggles and circles.


To colour in the image I used copic markers and  Ranger distress stickles for the bow and flowers. I then stuck the image on the page with glossy accents (its what I had handy), cut out the words "Focus on the good in life" and stuck them to the card as well.


I then mounted that all onto a brown 6"x6" card base.

I really like all of Janet's images in her online shop . I think because they are so fun to colour in and I am a big kid at heart.You will definitely be seeing more of these images on my blog to come. So come check back in soon!

                                                                             Always, -Kass