Saturday, 20 June 2015

DIY wedding on a budget featuring the wedding from Kippers and Curtains

Ive been to some beautiful weddings before. Bride looks beautiful, food is good, and venue looks posh. Im sorry maybe im a pessimist but all I can usually think at those weddings is " it should be nice, considering how much this all cost." Then its over, just like that.  You have to leave the venue, take off the dress and all your left with is photos and memories. All relatively "normal".

My friends Sarah and Lee's wedding was not your "normal" wedding. Which is a good thing as they are not a normal couple.  In a good way, I swear.  Most days when Sarah isn't working she is planning projects, wandering in the woods collecting bits, or daydreaming of a wild and free biker life. If you want to find lee just look for the children. He is most likely spinning around with one or more hanging off him.We joke that he could be a childrens party entertainer. So when these to [finally] united in marriage you just knew it was gonna be a good time.

So I  had an idea of what the wedding was going to be like. Sarah has been bouncing ideas off me the past year.  Seeing it all come together has been amazing.

The actual ceremony was at the leatherhead registry office in Surrey, England. It was so lovely! When I arrived Sarah was in the back of her brothers vintage taxi with their 3 children so Lee could not see them before the vows.

  We all went in and sat down and a beautiful ceremony followed with Sarah walking down the isle to the song from "last of the Mohicans". I cried so much! I don't know why, I'm just a big baby I guess. Its always when the father gives his daughter away that I tend to lose it. Then that's me crying for the rest of the ceremony.


It was beautiful and after we went out through the conservatory to the back where the newly united family stood for us and we blew bubbles and took pictures.


The wedding party got into a vintage fairway taxi and headed to the reception.


 Okay so we were lucky as this is just up around the corner from our house, so we could park at home and walk over.  When we walked through the field there were signs directing us where to go that sarah made and Lee put up.


The first thing we stumbled upon was a tree swing made from a palette with ribbons hanging all around it. I knew the kids were going to love this when they all got there and they definitely did.

The main area for the festivities was a extra large circus style marquee with a dance floor and tables set up inside. It had a  pick and mix sweets bar for the kids , a gorgeous rustic cake set up, lemonade pitchers, all with handmade signs and quirky upcycled curios lying about.


The tables all had centerpieces of painted bottles with wildflowers we had picked the day before at bloomin green in maidstone, kent.


The second area was uncovered with a croquet set up to play, a 3 metre tall tee pee "chill out" area, and her brothers awesome vintage taxi with a photo booth set up in the back. It had props inside and printed photos for you there! So much fun was had in that! ( To check out his website Anarchy photography Click Here.)

                                           ( The bride and her brother/photographer)


At one point an ice cream truck pulled into the field and the children went running after it. It pulled up to the party and handed out  ice cream for about an hour. Seriously, an ice cream truck, in the middle of an empty field. The bride and groom got inside the truck and handed out ice cream which resulted in some great photos!


We feasted on hog roast, laughed, and danced .


(My selfies with the bride and groom)


 Sarah wore the most gorgeous vintage style dress with lace embellishments.


She had a crown of wildflowers throughout the day and in the evening darned a  handmade Native American headdress that was gifted to her that day.


                                 (The couples eldest daughter Keira shouting a battle cry in mums headdress)


  Her shoes were a mint green . The flowers girls (her daughters) wore white sundresses with sleeveless jean jackets and cowboy boots. The "boys" wore beige linen suits with mint ties to match the brides shoes.


We had such a great time the whole day. Scarlett was not happy to be going home.


 Sarah has been blogging all about how she put this day together on her blog Kippers and Curtains. There you will find how she made her flower crown, what she used for her table decorations , and how she made the rustic signs that lead us around their whimsical celebration of love. Sarah has shown brides-to-be everywhere with some shopping around, and a little elbow grease, you can have a dream wedding without breaking the bank.

Thanks so much Stockleys for sharing you special day with us! We wish you many wonderful years together. x


That's all for now, see ya soon.    -Always, -Kass


Monday, 15 June 2015

Art Journal page inspired by Dina wakely


Hello all, I hope this post finds you all happy and well. Ive been rather chipper myself lately and I'm chalking it down to sunshine. I feel so much happier when able to spend some long hours out in the garden getting my hands dirty. June is the time of year when things really start to bloom and take over in the garden. It's gorgeous but it is high maintenance.


 But that's not what I'm here to talk about today. I'm here to talk about a fun, flowey, art journal page I created. This week I was stoked to receive my squiggly birds stamp set by Dina Wakely, in the mail. I immediately had to get to work with them. I grabbed my favourite bird and decided to create an art journal page. This project was inspired by the artist Dina Wakely. I'm very inspired by her recently. I love her style so much. Bold contrasts, painterly brush strokes, and a "no fear" attitude when it comes to white space. To check out more of her work , click here

So here's my go at a flowy back round mixed media art journal page:


 The Materials I used on this project:

Fresco chalk acrylics- chalk, dolly mix, orange

 Daler rowley Hard bodied acrylics- magenta, turquoise, yellow

Black gesso or paint

Silver metallic acrylic paint

Large, hard bristled paint brush

Copic fineliner pen 1.0

Scissors

Washi tape- pink/white stripe, music notes

Stencils- Chevron stripes, small squares, some bottles or glasses (you can use the bottom for different size circle stamps)

Magazine clippings and/or printouts of words you can make a sentiment from

Dina Wakely Squiggly birds stamp set, and her textures stamp set

Archival ink-jet black

1. Create a flowey back round by adding water to your hard bodied acrylics and "swoosh" different colours to your liking. I like the contrast from light white to dark black and everything in between.


2.Use your stencils. First with the chalk fresco colour through the chevron stencil then stamp Dinas grunge circles with the dolly mix fresco colour. Then run your orange colour through the stencil with the tiny squares. Try and put these in compositionally  pleasing places. A rule I always go by is placing things in odd numbers. For example,  the dolly mix grunge circles I have stamped in groups of three on adjacent corners.


3.Then grab the silver metallic paint and stamp it around using the bottoms of some glass jars you have handy. (dylusions sprays work, lid from gesso pots, also glass jar lids).

4. Stamp the bird with black archival ink. Preferably in some white space so you can see it clearly.


5. Rip off 2 bits of washi tape and position them so the bird is standing on them.

6. When the page is completely dry take your fineliner pen and draw squiggles and lines randomly throughout the journal page.

7. Cut out a word or quote from your magazine clippings and paste them on how you like. I went for a quote from my favourite book The catcher in the rye by J.D. Salinger. :

"she wasn't doing a thing that I could see, except standing there,leaning on the balcony railing,holding the universe together."

8. That's it , your done. Stand back and admire your artwork.

Hope you guys liked this page. Don't forget to follow me on here and on instagram.  the link can be found here: Her altered heart instagram page,

most of the materials you see on the list can be found online at some of the following shops:

Art from the heart     a sprinkle of imagination  The craft barn  (these are UK based shops)

For some more of my projects like this one click on the following links:

Vera Lane Seaside Tag

Stampotique art journal page

All about the journey card (suzi blu inspired)

Thanks, thats it for today! Check back soon .x

                                       Always, -Kass


Monday, 8 June 2015

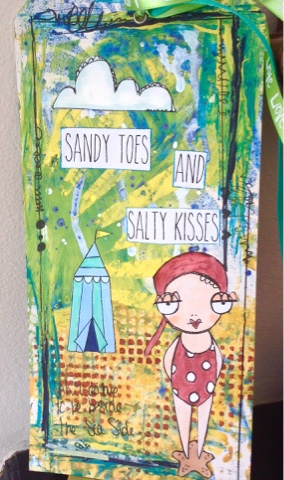
Project share: Vera Lane seaside tag

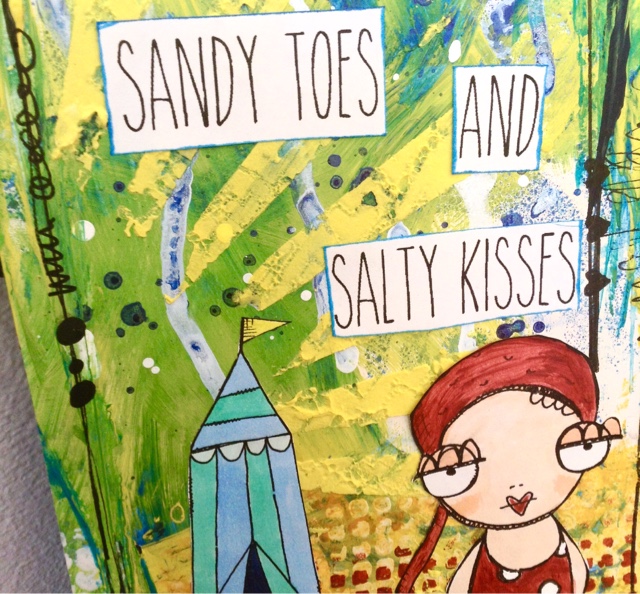
Hello you lovely lot. I wanted to share with you a tag I made the other day using some Vera Lane digi images. I used many different mediums on this tag. Fresco chalk acrylics, dylusions sprays, washi tape, copic markers, and ranger texture paste to be exact.


 The little squiggles and writing was done with my copic fineliner 1.0 pen. The larger tip on this pen has done a good job drawing over the painted bits.To colour the girl (her name is "olivia" by the way), I used some cheap metallic paints a friend picked up from the pound store.


  I had a lot of fun putting this together. I don't worry to much about straight lines and perfection. It feels good to just let yourself go with it and have fun.


In other news we went to the most fun wedding over the weekend. My friend Sarah  from Kippers and curtains put together a gorgeous outdoor themed wedding in the forest around the corner from the house. I'm going to be posting a bunch of pics of that soon but here is a selfie of me and the bride.


Stay tuned for more updates.x

                                                                        Always,-Kass


Friday, 5 June 2015

Project life: My Story


In a earlier blog post I explained some of the basics of project life. You can read all about that HERE  . Lately though I've been working in my "My Story" album.


Its a new project life release for 2015 from Becky Higgins. Unlike the original project life system which is completely blank for you to create, this one includes prompts to help you tell your life story. You have to purchase the insides ( that include the prompts and writing), and the outside album separately. 


Its smaller then the 12x12" or  9x11" albums as well.The My Story album is 6x8". So a much more handy, compact size. A lot easier to carry around in a bag or satchel for use on the go.For example I took mine on a recent family trip to the beach. I had visions of relaxing and filling in bits and pieces whilst my daughter played in the sand. Well it rained, and was freezing, but that's a story for another blog post.

Becky Higgins has been quoted saying that this would be the thing she would grab in the event of a fire. It should contain your entire life story. From genealogy through to your future plans. You can purchase 6x8 page protectors that fit and you can put them wherever you want.  I'm really enjoying using this system as I've always wanted to chronicle my life story but did not know where to start. Its a big undertaking. So the prompts really help you stick to and remember the important things you want to get across.


I have not done a whole lot in the album but here is a few pics of what I have done so far.


So there ya have it. The project life "My Story " system. Go out and give it a try!

Oh yea, so sorry I havent been on in a week or so, Super busy lately. But I have been crafting, and creating I promise! For more frequent picture updates follow me on instagram. Link over on the right. My friends are getting married this weekend and I have been helping with bits and peices. The bride has created most everything herself and you can read all about that on her blog Kippers and Curtains.  So check it out and tell her I sent you. Speak soon my lovelies.
                                                                     
                                                                      Always, -Kass